 Enable QuickBooks Integration:
1. Allow Skyware connection to QuickBooks:
The interface channels that your Property has set up with Skyware are all managed through the Interfaces screen. To allow Skyware to insert your records directly into QuickBooks (instead of the information being sent in an email that requires cut and pasting) during the financial night audit process, you will first need to allow Skyware to connect to QuickBooks via this screen.
Open the Interfaces screen:
Click the icon on the left for the Full Menu.
 OR
OR 
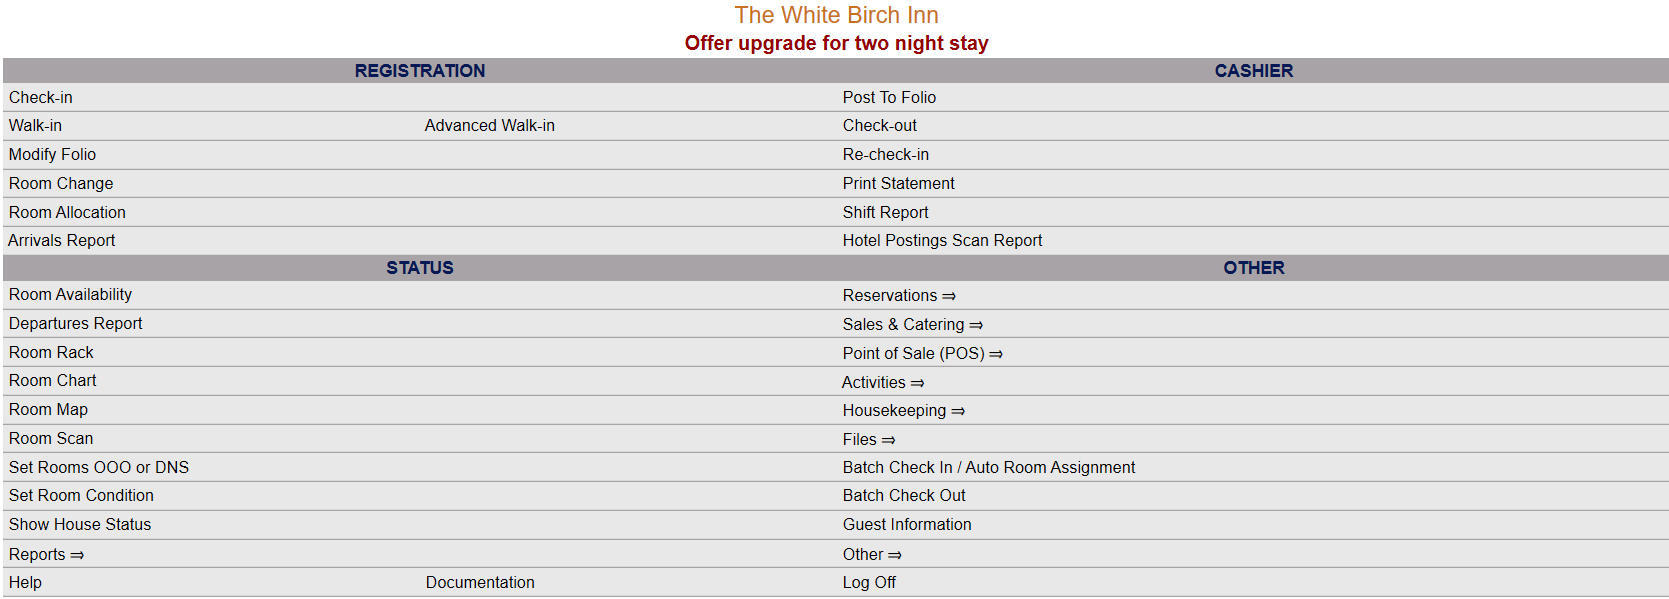
This will display the Full menu in a tabular form, with four sections, Registration, Status, Cashier and Other.
 OR
OR 
Select Other from the Other section.
 OR
OR 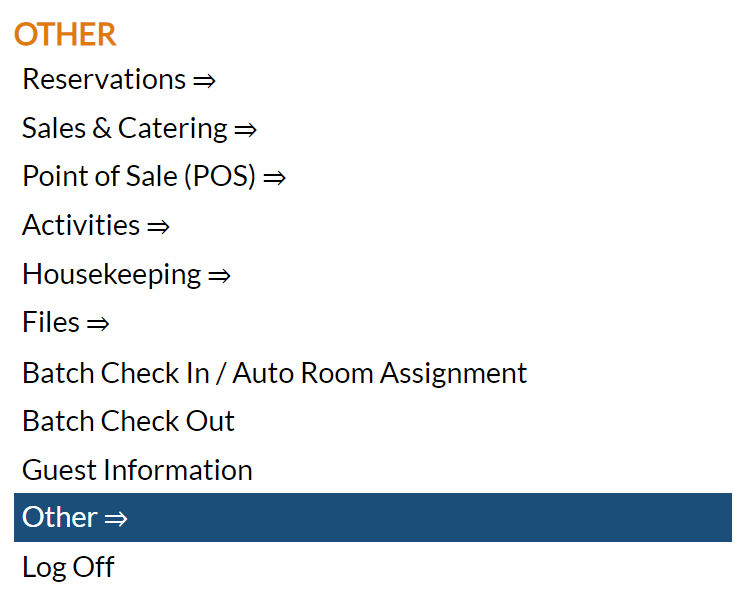
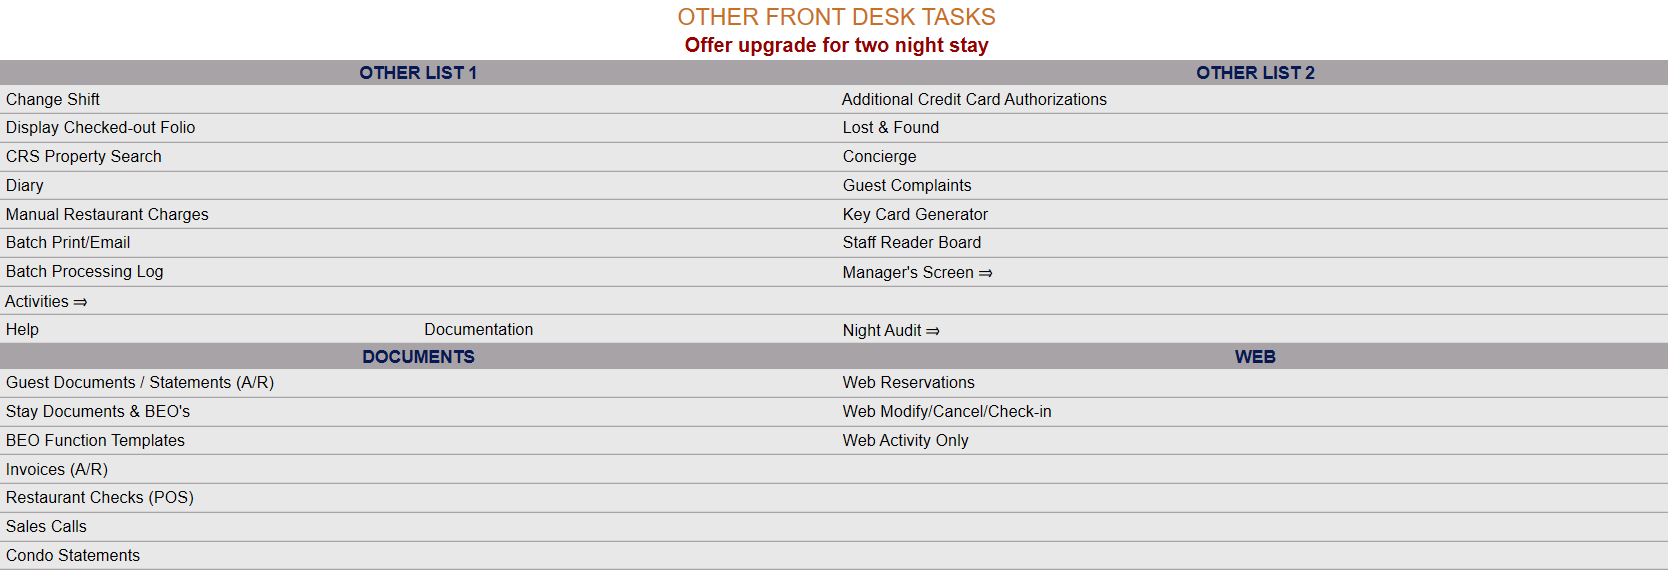
This will take you to the Other Front Desk Tasks Menu, which has four sections, Other List 1, Other List 2, Documents and Web.
 OR
OR 
Select Manager's Screen to be taken to the Manager's Commands Menu screen.
 OR
OR 
OR:
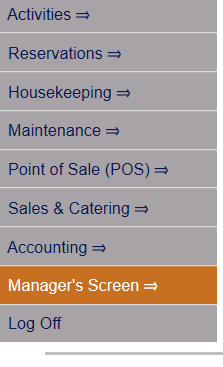
Select Manager's Screen from the Quick Menu on the left side of the screen, to be taken to the Manager's Command screen.
 OR
OR 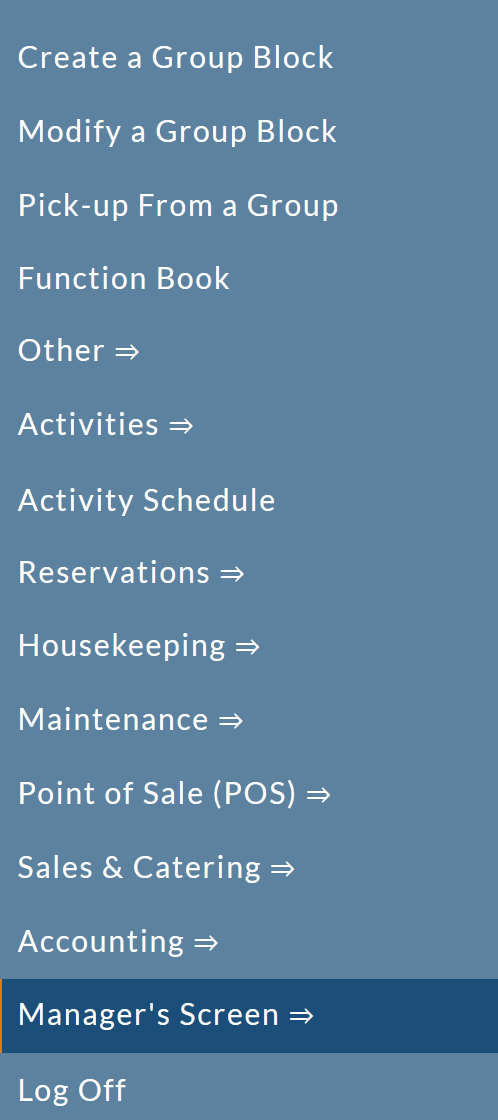
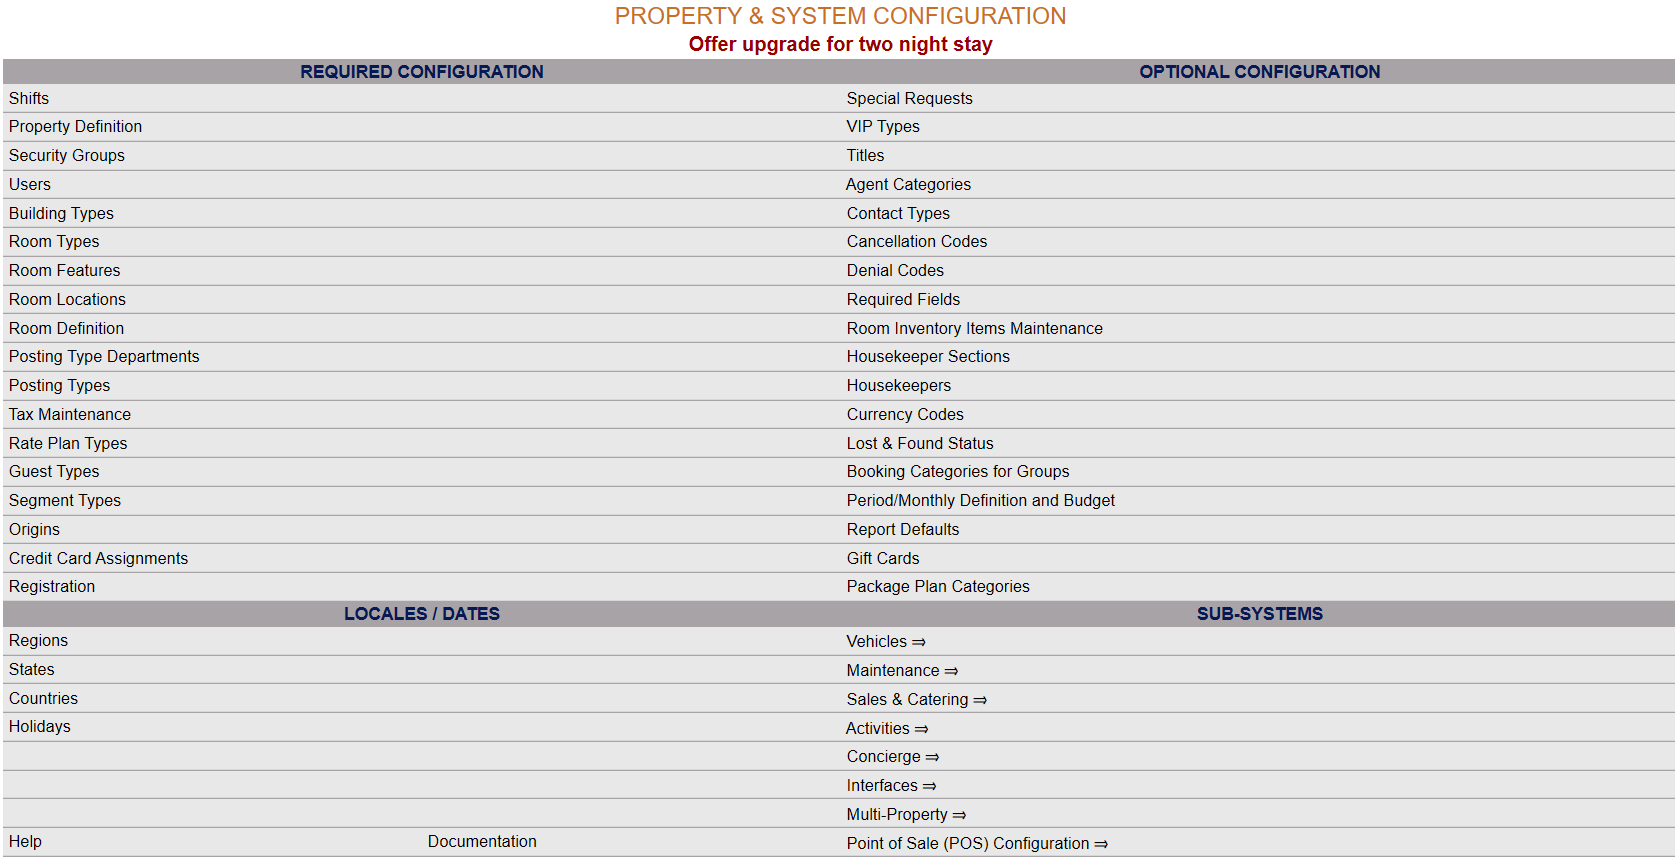
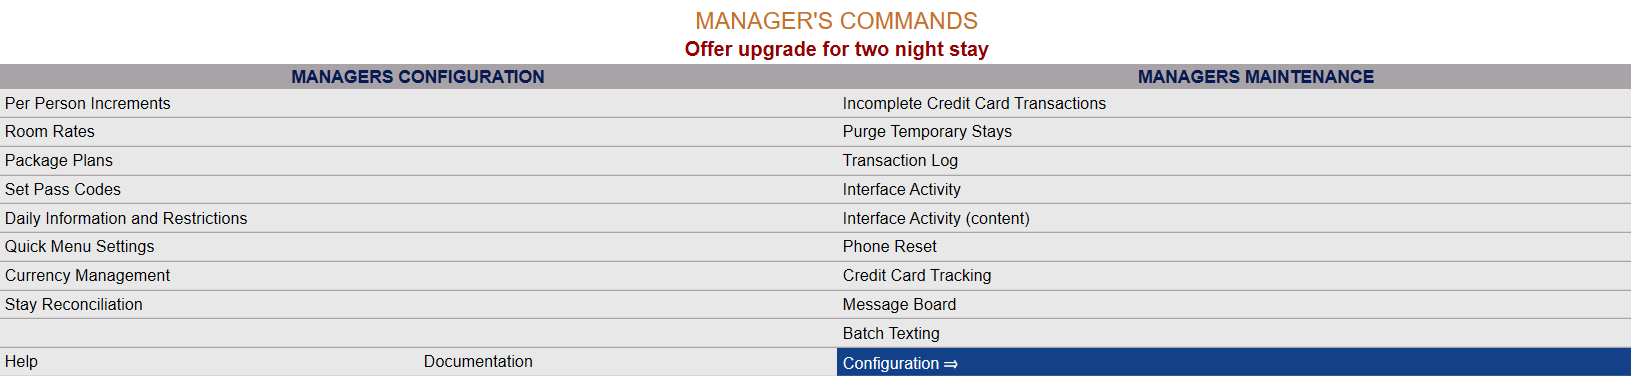
The Manager's Command screen menu has two sections, Manager's Configuration and Manager's Maintenance. Select Configuration => from the Managers Configuration section to be taken to the Property and System Configuration screen. The list of property configuration options are divided into four sections, which are Required Configuration, Optional Configuration, Locales/Dates and Sub-Systems.
 OR
OR 
(Alternately, you may also be able to select Configuration => directly from the Quick Menu, if the menu has been set up to include the Configuration option).
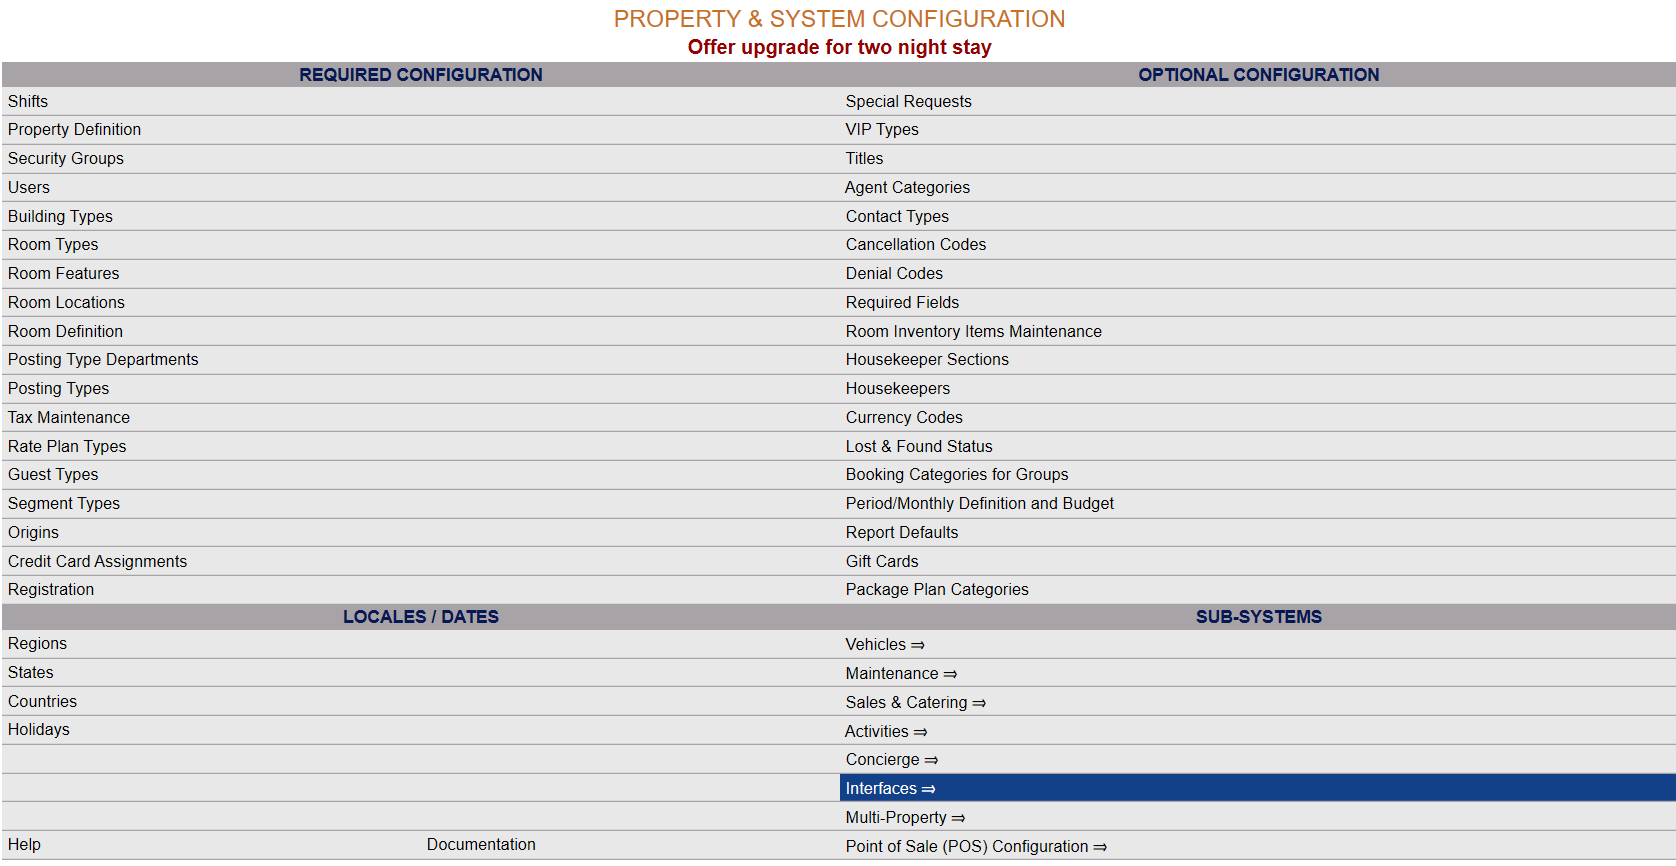
Select Interfaces => from the Sub-Systems area of the screen.
 OR
OR 
This will take you to the Interfaces Maintenance Menu screen.
 OR
OR 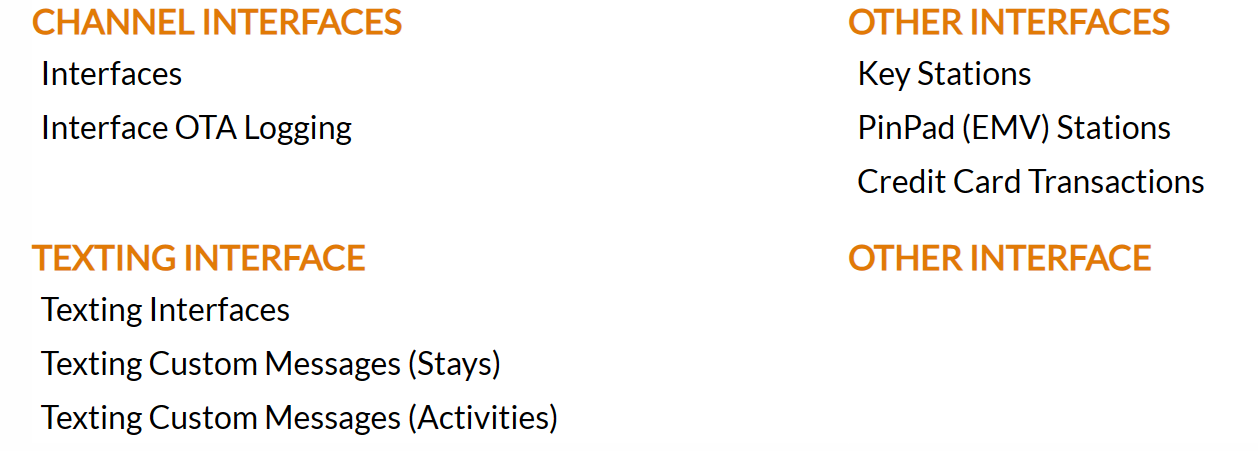
The Interface Maintenance area commands are divided into four sections: Channel Interfaces, Texting Interface, Other Interfaces and Other Interface.
Select Interfaces from the Channel Interfaces section.
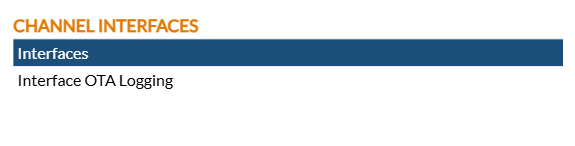
When selected the Interfaces screen will open.
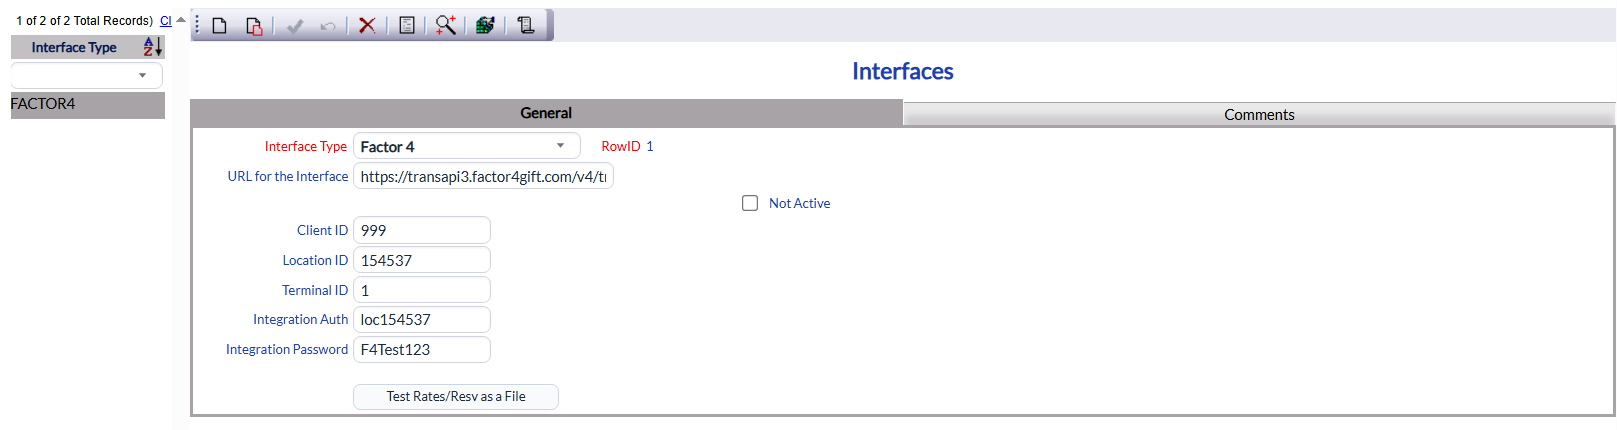
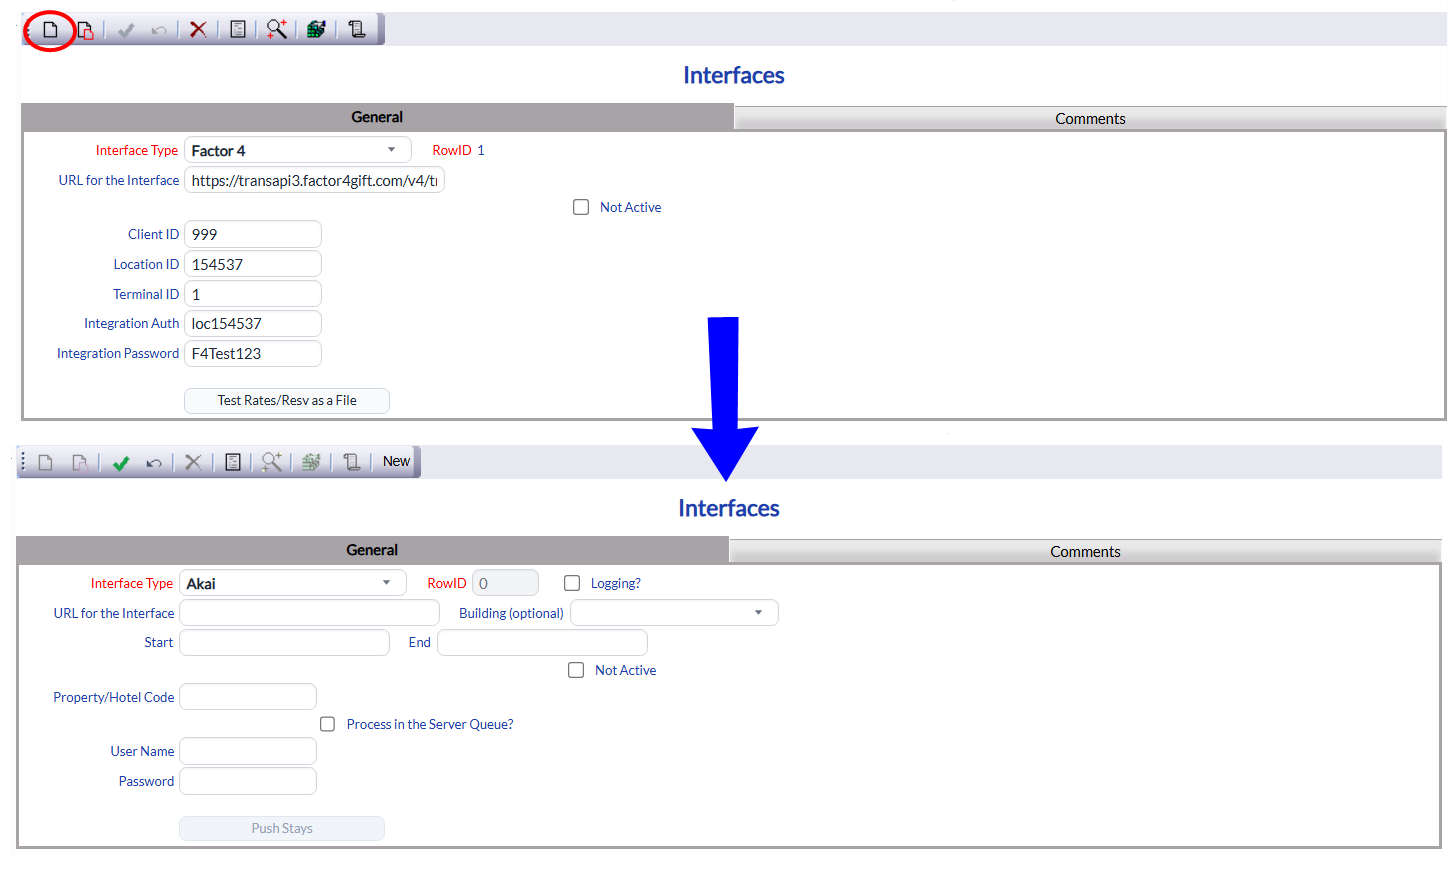
Generate a new record by clicking the New  button from the local tool bar.
Note: If no interfaces are currently associated with your Property, a pop up message telling you that there are no records to display will first appear when you click the Interfaces command in the menu.
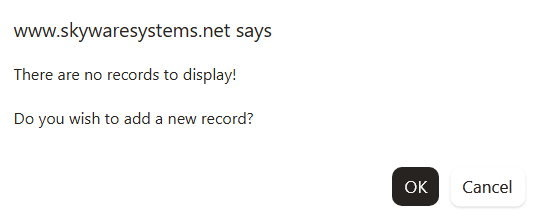
Click "OK" to continue to the screen, where it will already be ready to generate a new record.
On the Interfaces screen in the Interface Type field, select "QuickBooks Direct Link" from the drop-down list of available interfaces.

Save the Interface by clicking the Save  button in the local tool bar to make the "Connect to QuickBooks" button live. It will be grayed out and unavailable until the Interface has been saved.
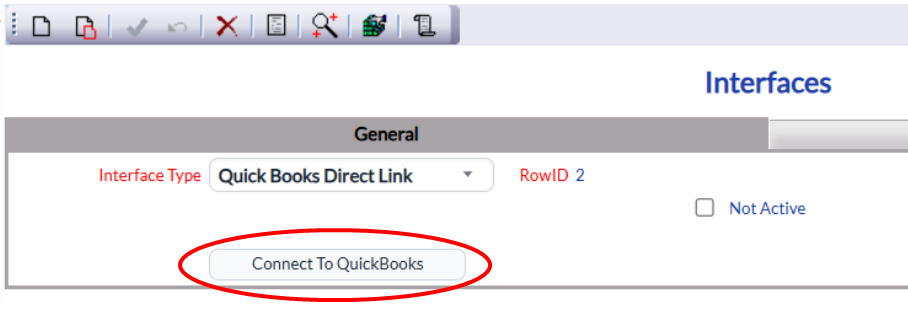
Use the "Connect to QuickBooks" button to take you to the Intuit QuickBooks screen.
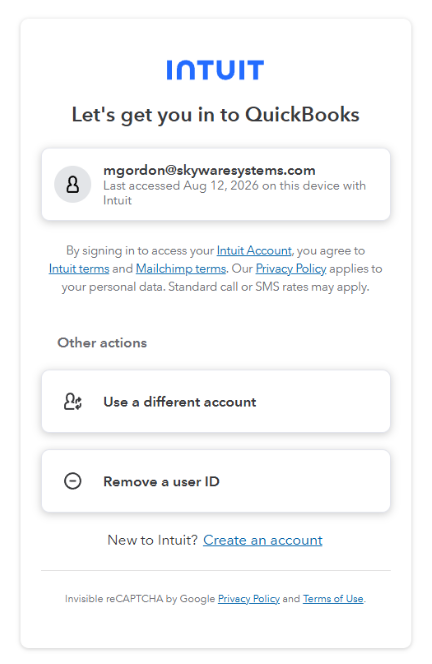
Log into your QuickBooks account, and fill in the information required by QuickBooks.
Note: By using the "Connect to QuickBooks" button to reach QuickBooks, once you have logged in, it will show the connection with the Skyware ID already entered for you.
Agree to connect to Skyware.
Return to the Interfaces screen, and the "Connect to QuickBooks" button will now say "Connected to QuickBooks", and a second button will appear below it, the "Push Date to Sync" button.

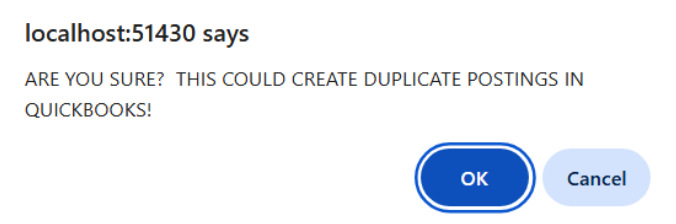
Note: Do NOT manually push the data unless an error has occurred with the Financial Night Audit process as otherwise, you will get duplication of the data in QuickBooks, only push if the data does not go (due to for example a communication error) during the FNA. This is a fail-safe button, and should never need to be used.
If you DO click this button, a pop up message will appear, asking you if you are sure, and warning of the possible duplication of postings.
Your Skyware system is now integrated with QuickBooks.
2. Set the Property General Ledger (GL) Off Set or Clearing account number:
To allow Skyware to directly send data to QuickBooks, you must ensure that the Property General Ledger (GL) Off Set or Clearing account number (from the QuickBooks Chart of Accounts) has been added to the field "QUICKBOOKSOFFSETNUM" on the Property Definition screen.
The General Ledger (GL) is a record of all past transactions at your Property. General Ledger (GL) accounts contain all debit and credit transactions affecting them. Due to the nature of Property Management, any accounting relies on a double-entry bookkeeping system, where every transaction affects two accounts. This system ensures that the books remain balanced, reducing errors and supporting accurate financial reporting. As often guests may stay multiple nights but only pay at the end of the stay (not every day), there must be a balancing (also known as clearing, or offset) account for PMS, as the accounts do not balance until payment is made. This is simply a "holding" account, as Debits MUST equal credits EVERY night for the financial night audit. Thus every GL account is associated with an offset account so that the debits and credits balance. Whilst multiple GL accounts may be generated, they may all be associated with the same GL offset account.
The QuickBook Chart of accounts organizes financial transactions into categories. For use with Skyware, the accounts must have numbers; these numbers will need to be entered into Skyware MANUALLY (to direct Skyware where to push the data correctly).
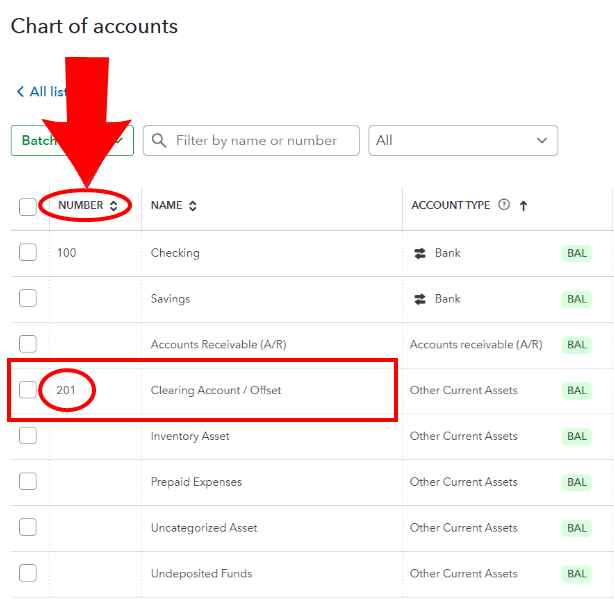
The Clearing Account/Offset account number is entered on the Property Definition screen, meaning it is used as the general offset account for ALL Posting Types reporting to QuickBooks.
Open the Property Definition screen:
Select Managers Screen from the Quick Menu on the left side of the screen, then select Configuration > Property Definition.
OR 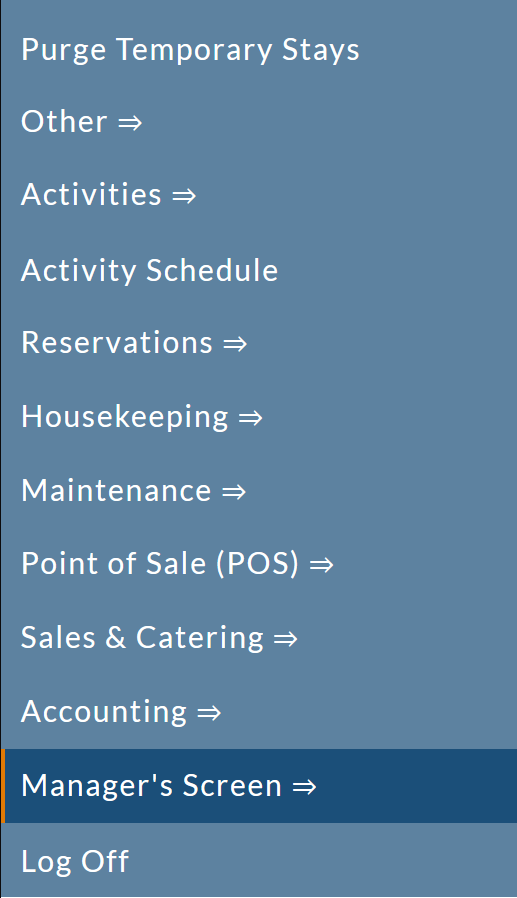
OR
Select Other => from the Other section (bottom right) of the Full Menu.
Click the icon on the left for the Full menu.
OR
This will display the Full menu in a tabular form, with four sections, Registration, Status, Cashier and Other.
OR
From the Other Section, select Other =>.
 OR
OR
This will display the Other Front Desk Tasks Menu, divided into four sections: Other List 1, Other List 2, Documents and Web.
OR
From the Other List 2 section, select Manager's Screen => to be taken to the Manager's Commands Menu screen.
OR 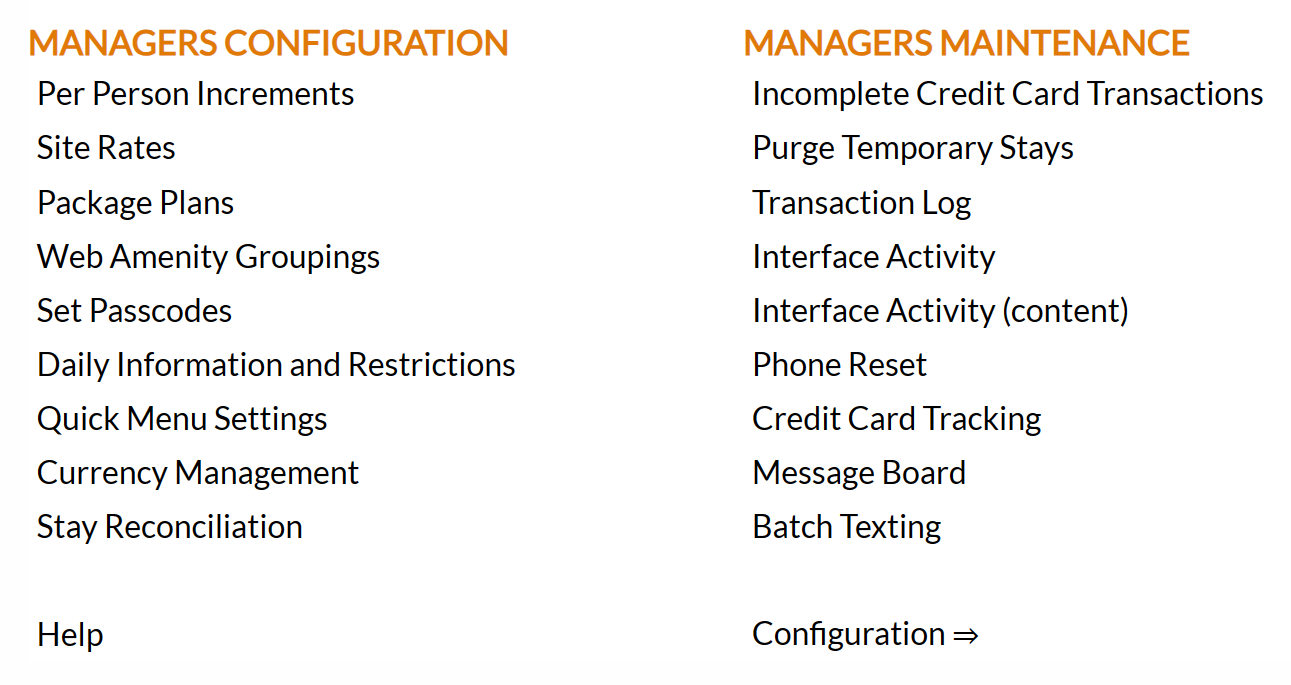
From the Manager's Commands Menu, select Configuration to be taken to the Property and Configuration Menu screen.
 OR
OR 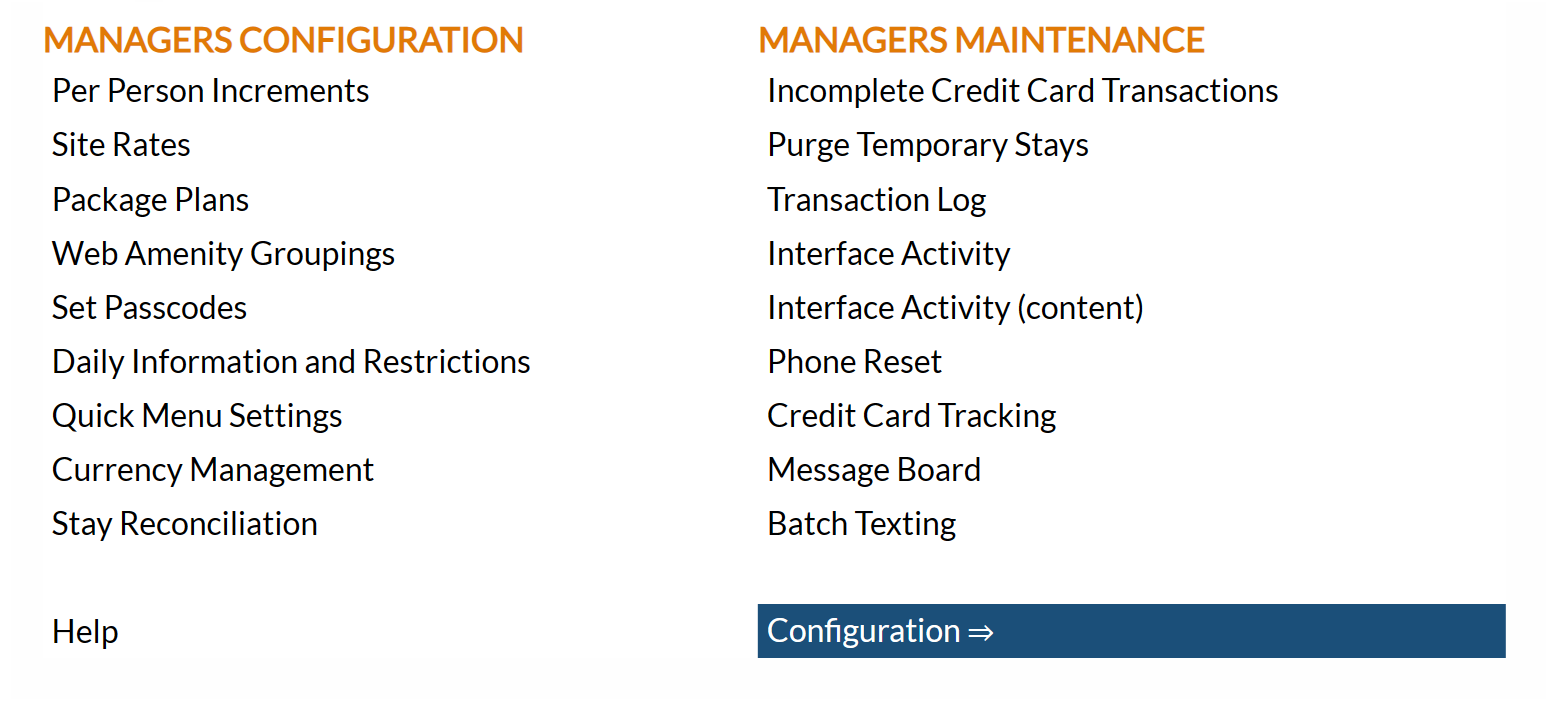
Alternately, you may also be able to select Configuration directly from the Quick Menu, if the menu has been set up to include the Configuration option. This will also take you to The Property and System Configuration Menu.
OR 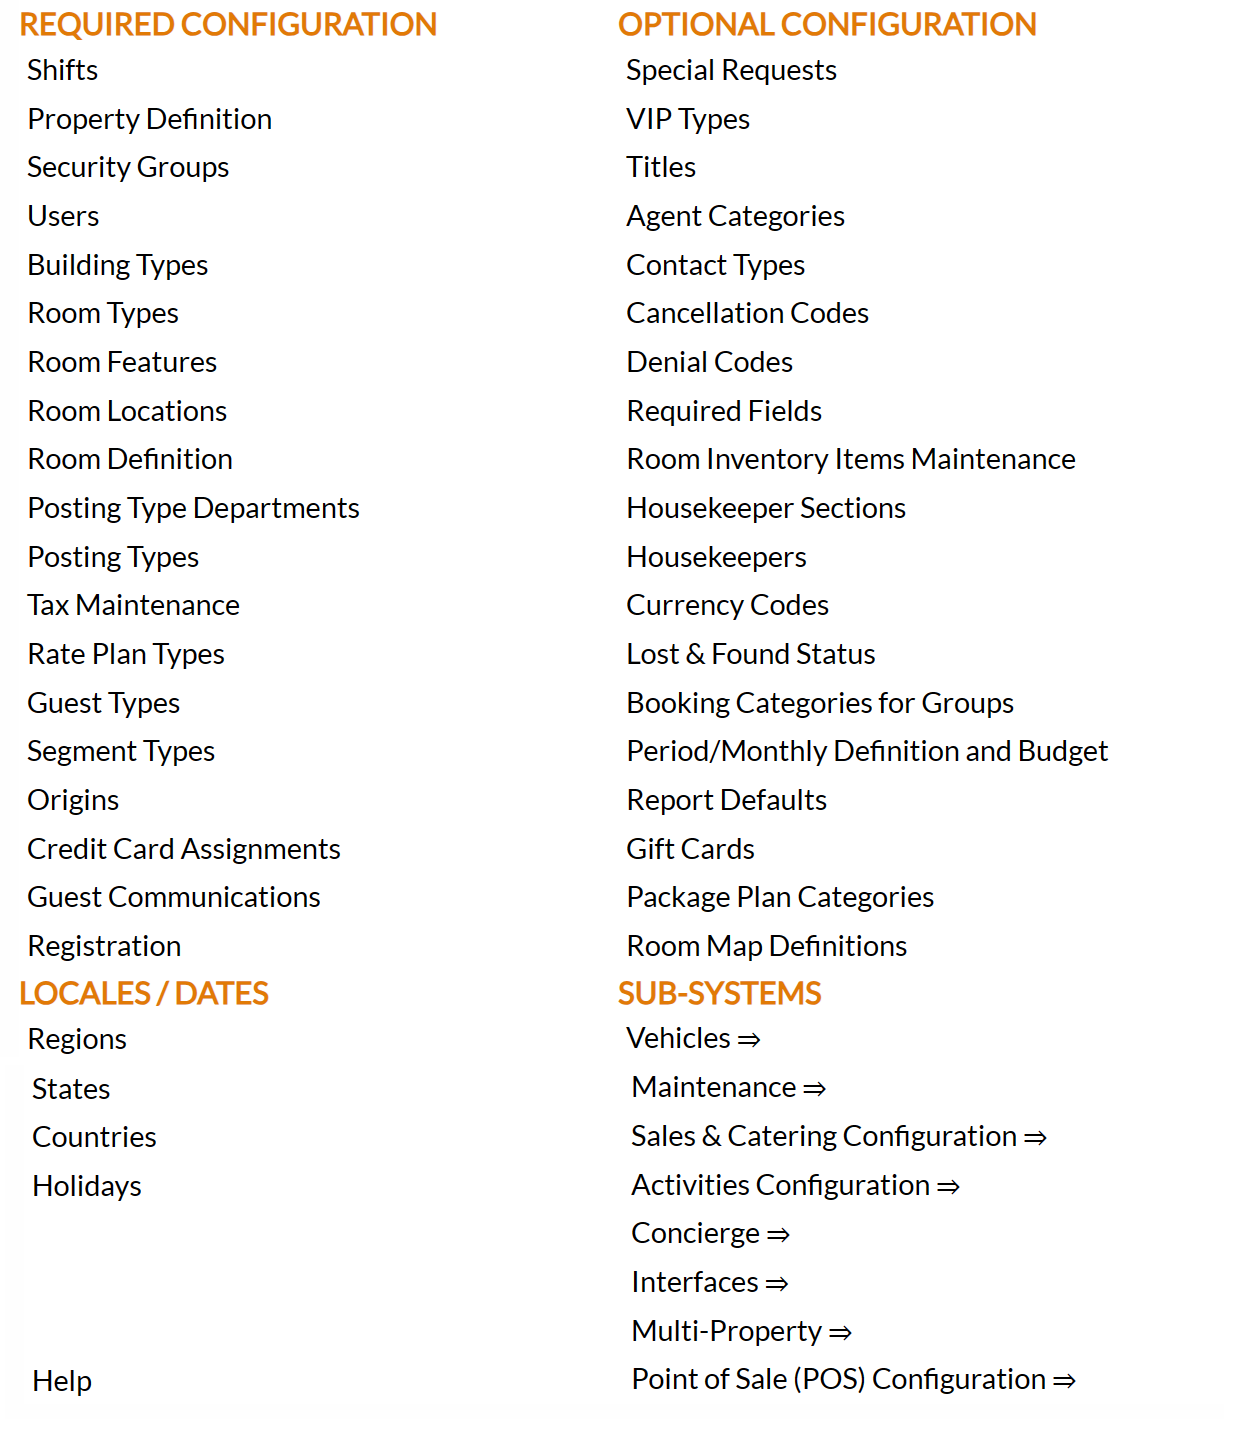
The list of property configuration options are divided into four sections, which are Required Configuration, Optional Configuration, Locales/Dates and Sub-Systems.
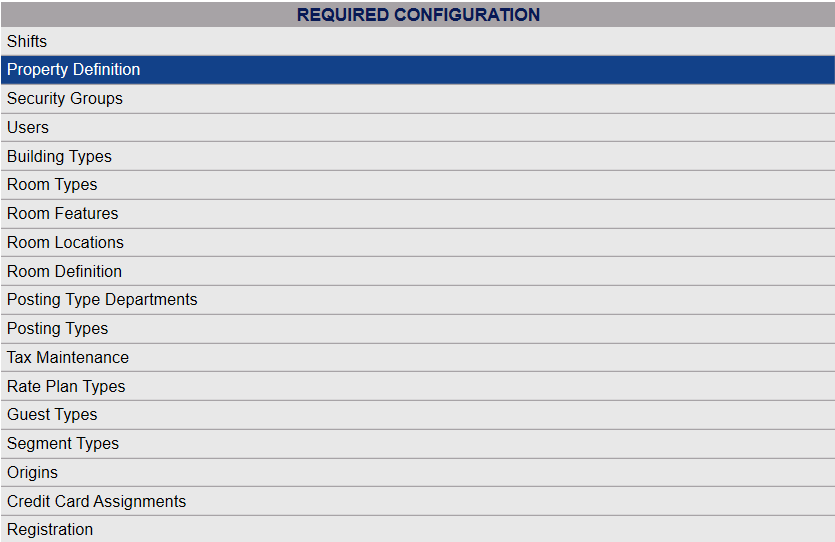
Select Property Definition from the Required Configuration section.
 OR
OR 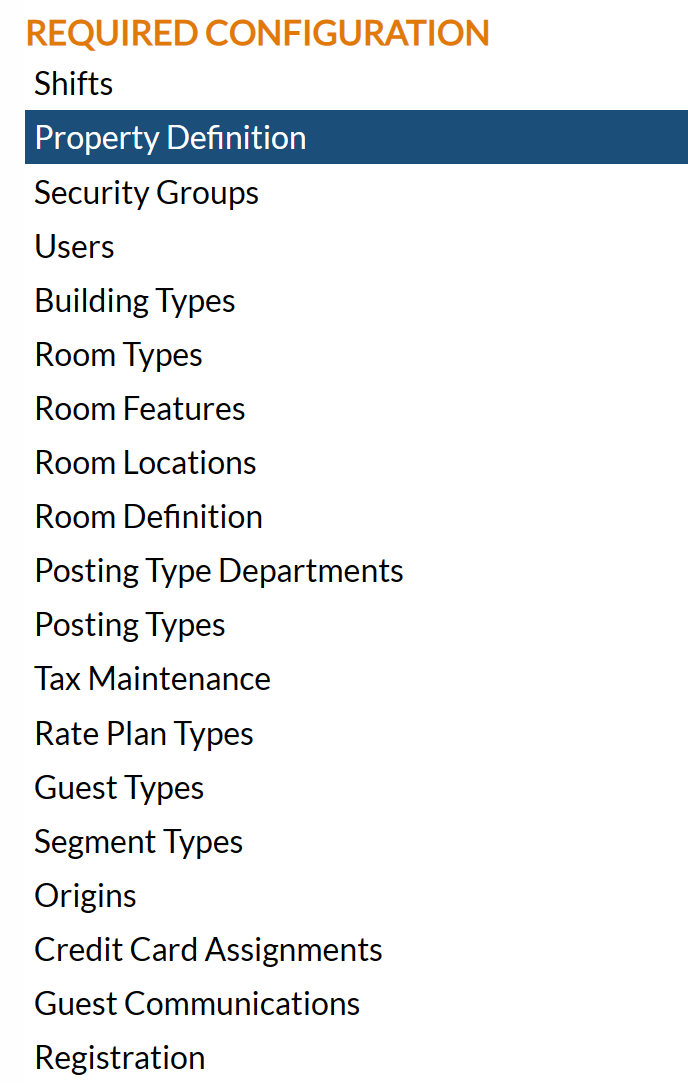
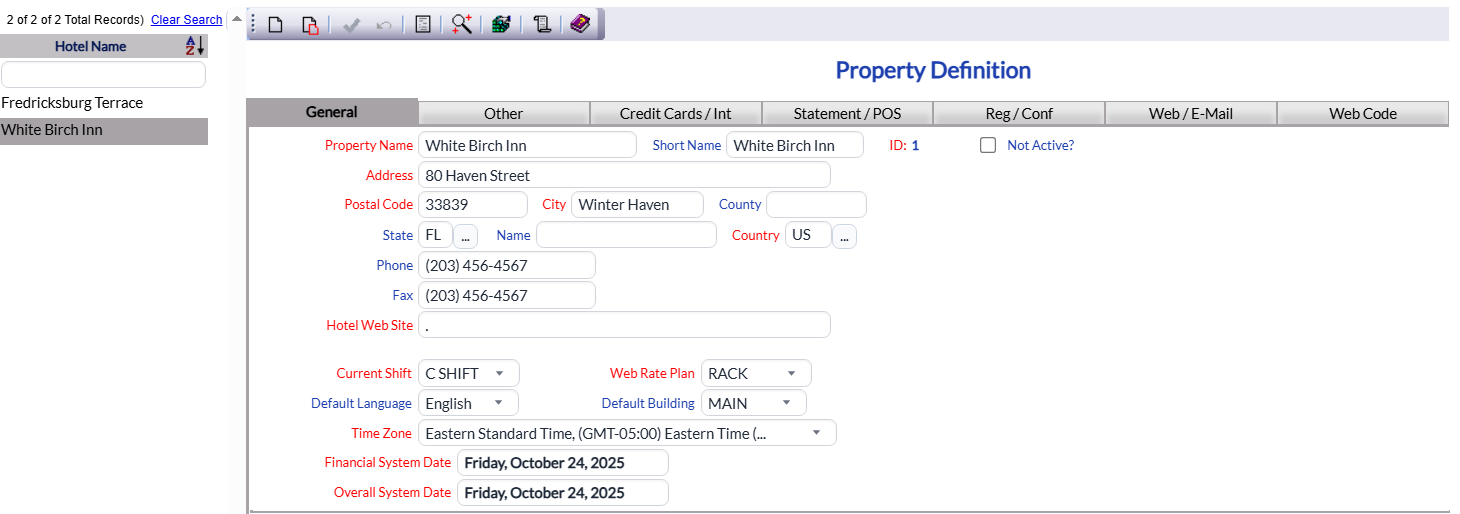
By Default, the General tab will be open when you arrive at the Property Definition screen. You will need to open the Other tab.
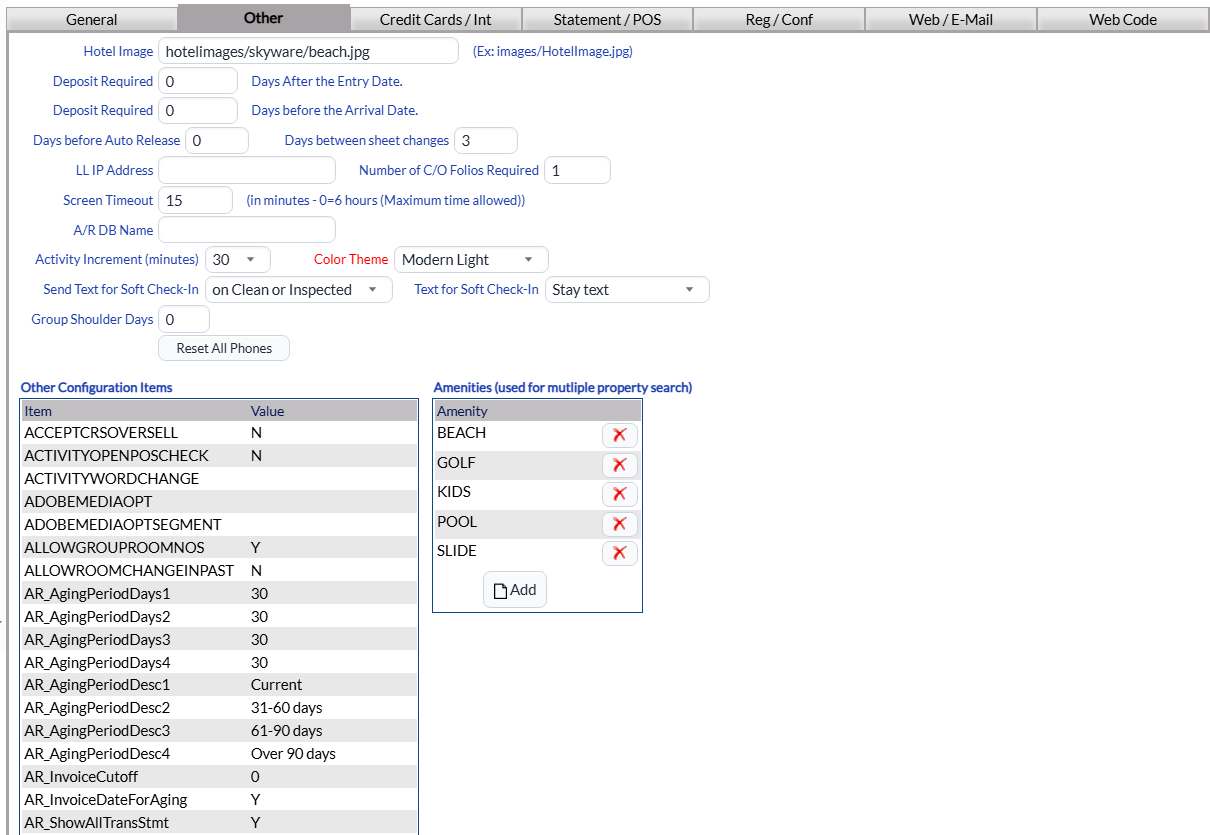
Scroll down the Other Configuration Items table ( this is a large table displaying the results of other configuration items in Skyware Systems areas that you can see in one area, to see how your system is configured at a glance) until you reach the QUICKBOOKSOFFSETNUM option. To change the configuration you will need to go to the specific configuration screen, by clicking on the line item. (This table is display only in the Other tab).
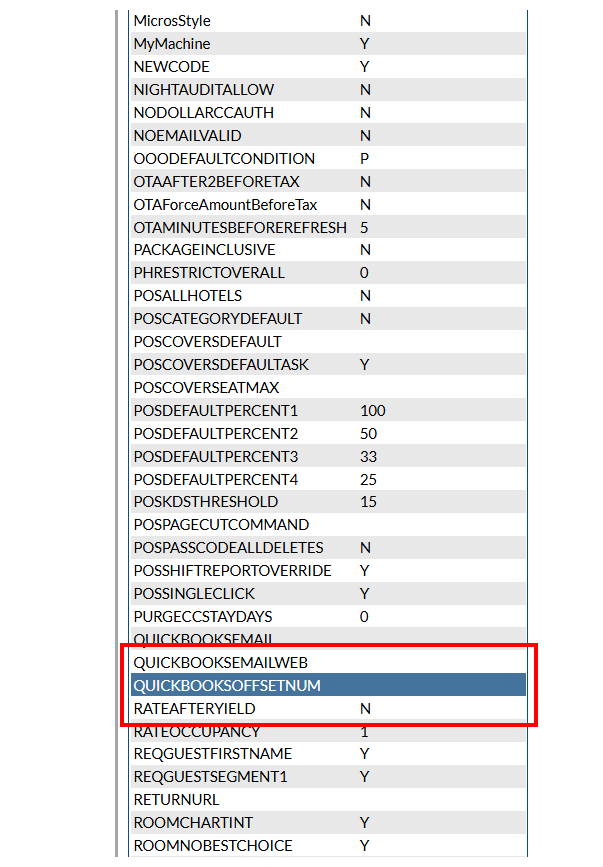
Click on QUICKBOOKSOFFSETNUM to open the Configuration screen.
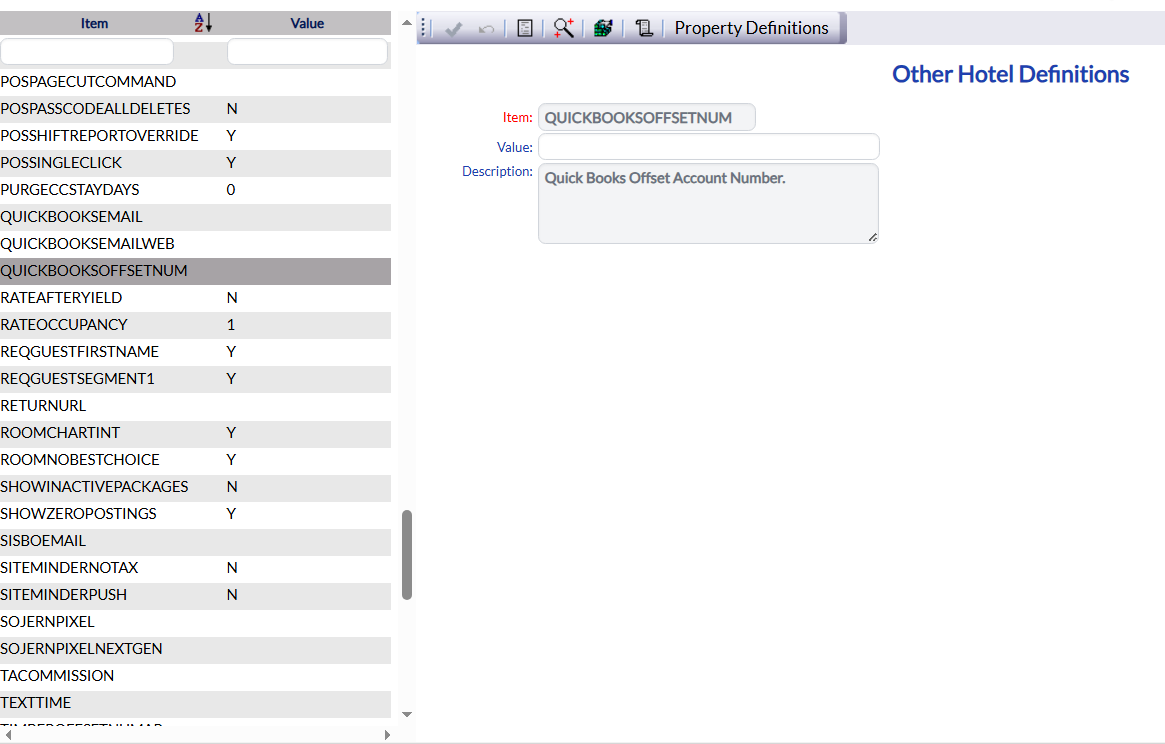
Enter the Clearing Account/Offset account number from QuickBooks into the Value field and save (). This is now your GL Offset number, for automatic use with reporting to QuickBooks. Use the Property Definitions button in the tool bar to return to the Property Definitions screen, where you will see the account number has been added to the QUICKBOOKSOFFSETNUM option.
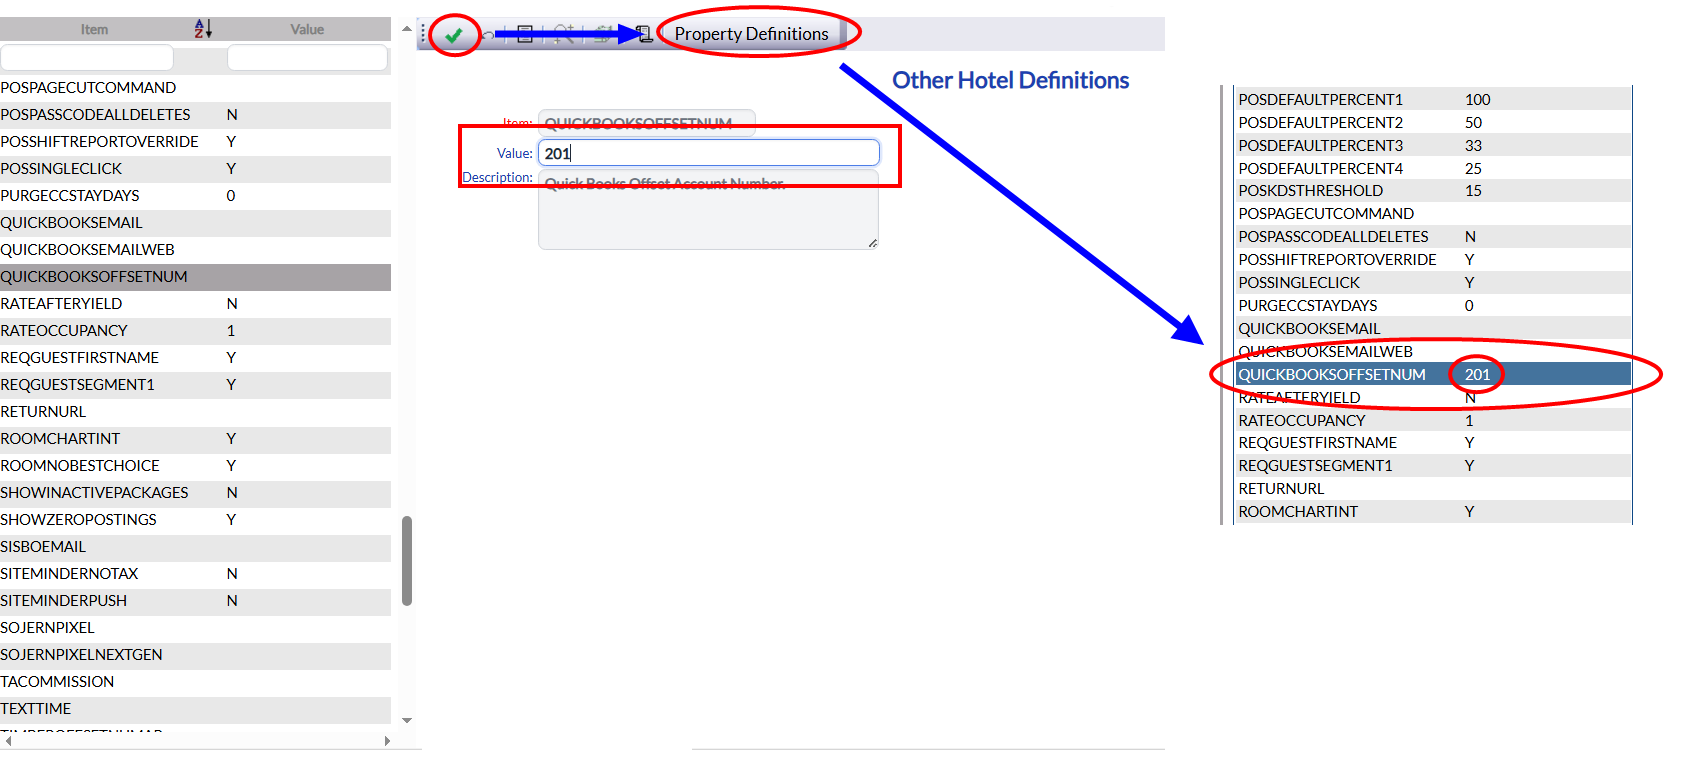
This account number will now be used with every Posting Type reporting to QuickBooks, UNLESS a different GL offset account number is added to the individual posting type - any number entered into the GL offset field on the Posting Types Maintenance screen will OVERRIDE the default GL Offset number entered here on the Property Definitions screen.
3. Set the General Ledger (GL) account numbers on the Posting Types reporting to QuickBooks:
Every Posting Type that will be reporting revenue to QuickBooks must have the relevant GL account number (from the QuickBooks Chart of Accounts) entered into the General Ledger field on the screen.
Every Property may have as many or as few accounts in QuickBooks as wished - for example, you may choose to have all credit card transactions sent to one particular account, rather than sent separately. It is up to you - you may have ALL revenue going to the same account, or every Posting Type may send information to a different account, or any combination in between.
Open the Post Type Maintenance screen:
Click the icon on the left for the Full Menu.
OR
This will display the Full menu in a tabular form, with four sections, Registration, Status, Cashier and Other.
OR
Select Other => from the Other section. This will display the Other Front Desk Tasks Menu, which has four sections, Other List 1, Other List 2, Documents and Web.
OR
Select Manager's Screen to be taken to the Managers Commands menu.
OR
OR: Select Managers Screen => from the Quick Menu on the left side of the screen, to be taken directly to the Managers Commands menu.
OR
The Manager's Command screen menu has two sections, Manager's Configuration and Manager's Maintenance.
 OR
OR
Select Configuration to be taken to the Property and System Configuration menu. The list of property configuration options are divided into four sections, which are Required Configuration, Optional Configuration, Locales/Dates and Sub-Systems.
OR
Alternately, you may also be able to select Configuration => directly from the Quick Menu, if the menu has been set up to include the Configuration option.
Select Posting Types from the Required Configuration section.
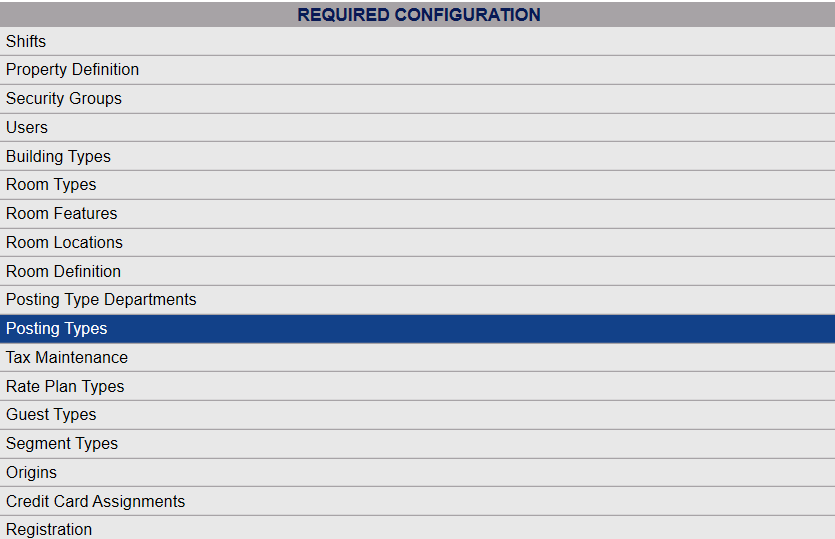 OR
OR 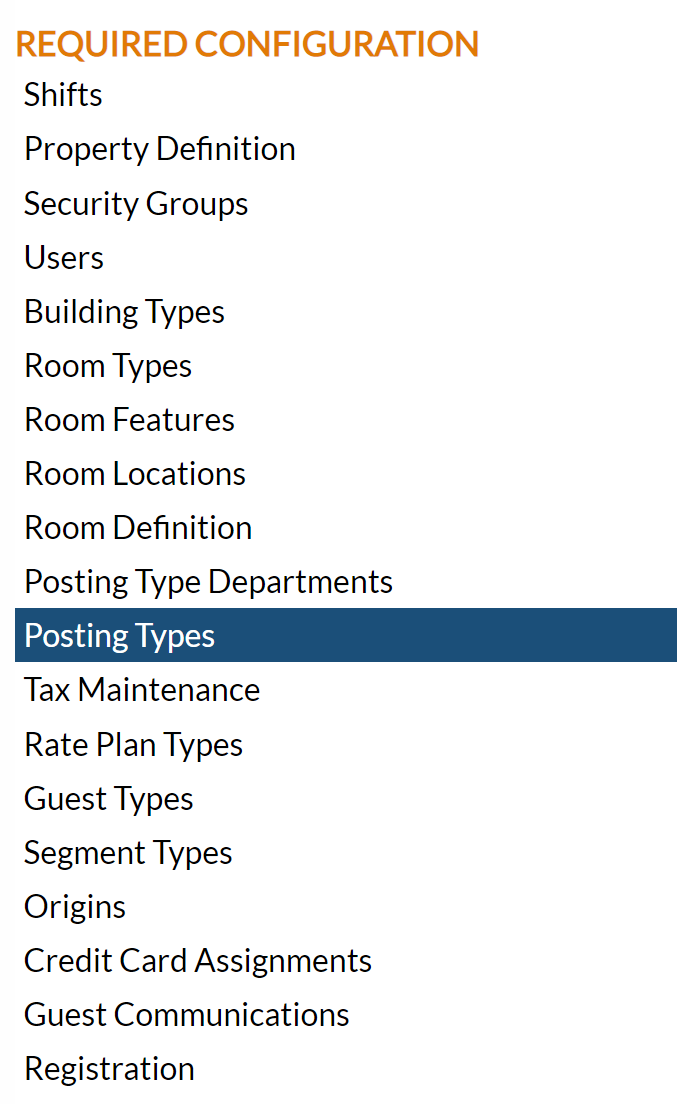
When selected, the Posting Type Maintenance screen will open. Select the desired posting type on the left to display the details on the right.
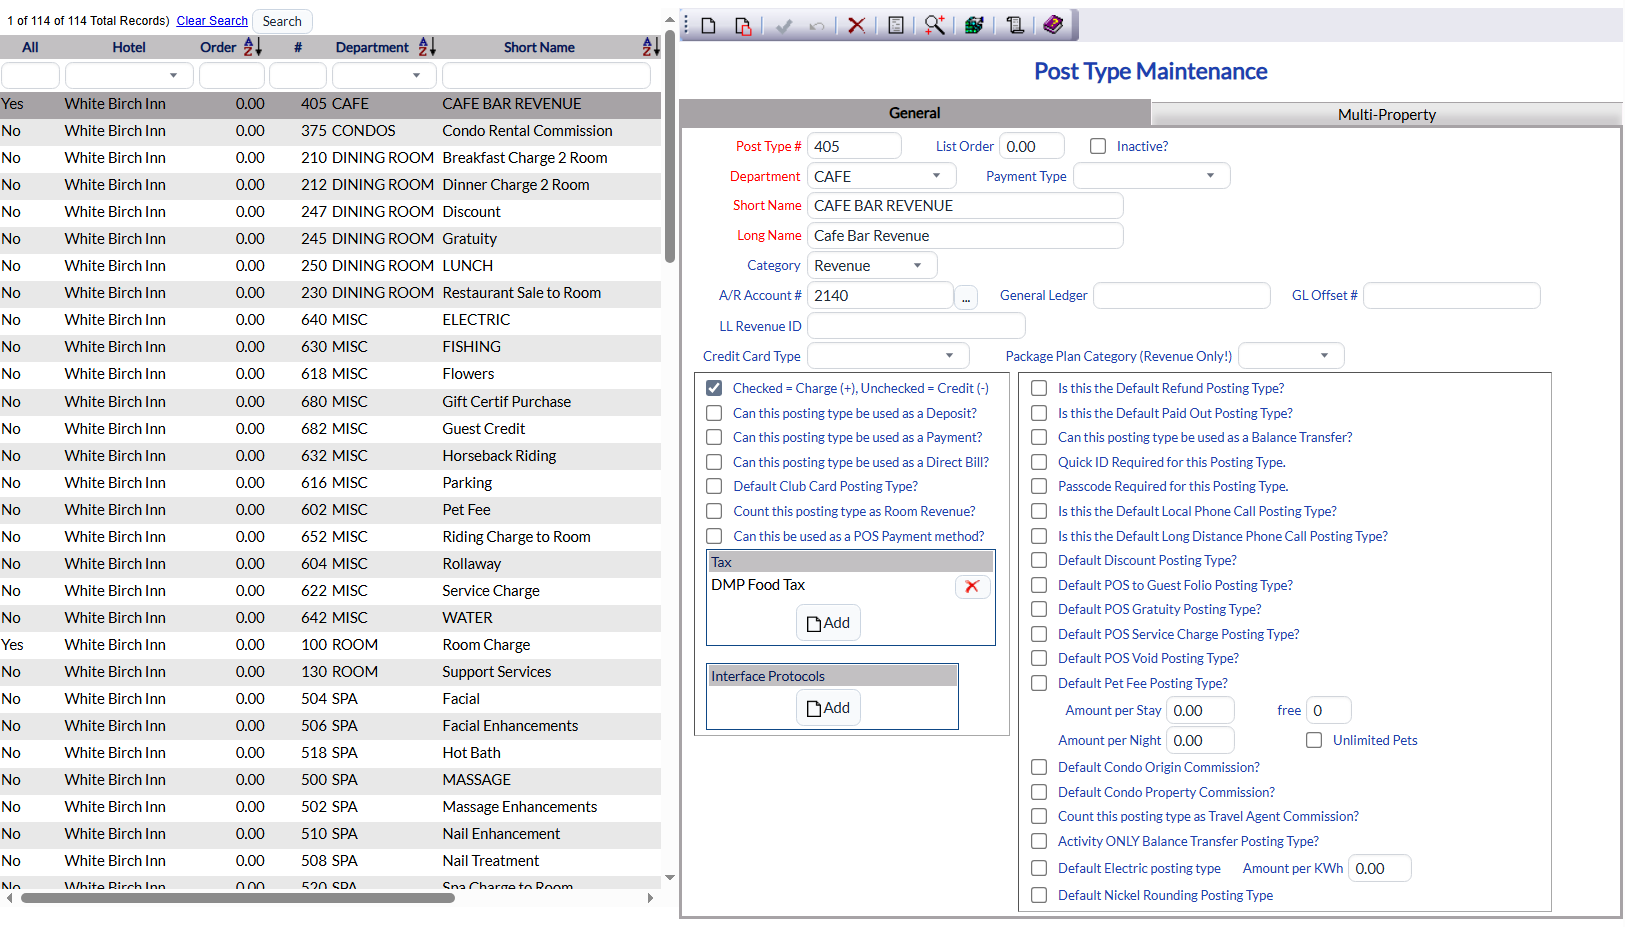
For EVERY Posting Type you wish to have reported to QuickBooks, enter the desired GL ledger number (from the QuickBooks Chart of Accounts) into the General Ledger field.
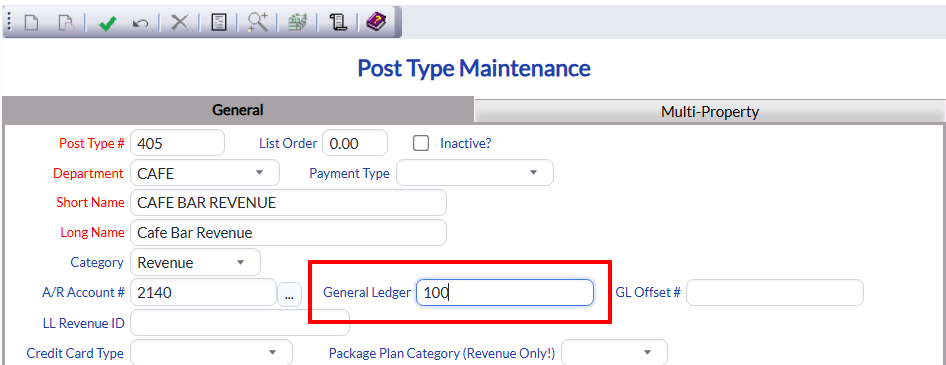
IF the default GL offset number is NOT to be used with this Posting Type, enter the account number to be used instead in the GL offset number field. If this field is left blank, Skyware will use the overall offset entered on the Property Definitions screen. (Any number entered into the GL offset field here on the Posting Types Maintenance screen will OVERRIDE the default GL Offset number entered on the Property Definitions screen).
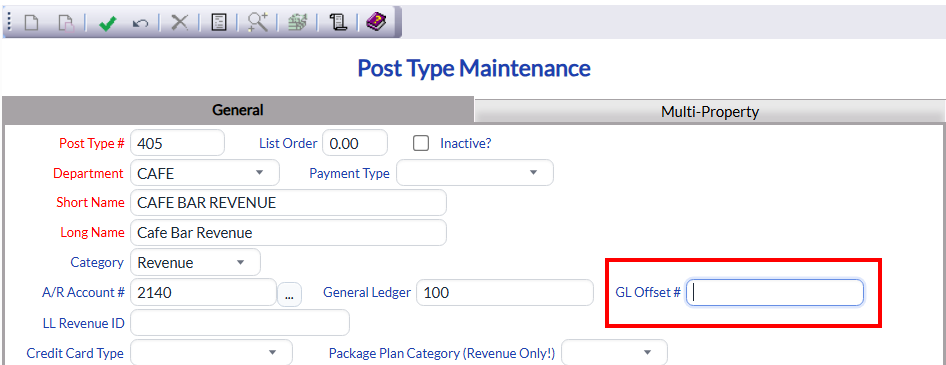
Save () the changes to each posting type when adding General Ledger QuickBook account numbers. Information for any Posting Type will NOT post to QuickBooks without an entered General Ledger account number.
Once these steps have been completed, your Skyware system will now be integrated with QuickBooks. Automatic transmission of the records from Skyware to QuickBooks during the financial night audit process should now occur (for all Posting Types that have been enabled).